This tutorial will teach you how to create signup and login functionality on an app built with Vue3, Express, Mongo, and Node. We'll start where our last tutorial left off: Connecting our ExpressJs/Vue3 App to a Mongoose Database. Following along this example project will show you how to get started with user logins.
Prerequisites
- This tutorial picks up from our last tutorial: Connecting our ExpressJs/Vue3 App to a Mongoose Database
- Make sure to have
.envvariables setup with your MongoDB as this file cannot be in our git repo. - A basic understanding of git, and npm.
Setup
Let's start by cloning the project from our last tutorial.
git clone [email protected]:Initial-Apps/vue3-express-mongo.git passportJs-MEVNOpen a new terminal window, move into the server folder and install our npm modules.
cd passportJs-MEVN/server
npm install
Make sure to also have your .env folder setup with your MongoDB key as we did in the last tutorial.
You can then start the server by running:
node serverjsNext, let's also setup the client side. Open a new terminal window, move into the client folder and install our npm modules.
cd client
npm install
You can then start the client development server by:
npm run devImplementing PassportJs
PassportJs is a popular npm module that runs on our server. This module provides functionality for signing up, as well as logging in and out on our server. Some notable functionalities include validating usernames and passwords, storing logged in user session data for access on our server.
We start by making a passport directory on our server. Open a new terminal window and make the new directory inside the server folder by running the following from the terminal or using your preferred code editor:
cd server
mkdir passport
Then we make a new file titled init.js and add the following:
const login = require('./login');
const signup = require('./signup');
const User = require('../models/user');

module.exports = function(passport){
	passport.serializeUser(function(user, done) {
		done(null, {
			_id: user._id,
		});
	});
	passport.deserializeUser(function(userSession, done) {
		User.findById(userSession._id)
		.then((user)=>{
			console.log('deserializingUser');
			done(null, user)
		})
		.catch((err)=>{
			console.log(err);
			done(err)
		})
	});
	login(passport);
	signup(passport);
}
In summarizing the above, the serialize function stores the user id into the session for our app to reference. The deserialize function can retrieve any user data we specify based on the stored user id. Together, these functions enable Passport.js to maintain user sessions and facilitate authentication throughout the application.
Then we make a new file titled signup.js and add the following:
const LocalStrategy = require('../node_modules/passport-local').Strategy;
const mongoose = require('mongoose');
const User = require('../models/user');
const bCrypt = require('bcrypt-nodejs');

module.exports = function(passport){
	// LOCAL AUTHORIZATION STRATEGY
	passport.use('signup', new LocalStrategy({
		usernameField: 'email',
		passReqToCallback : true // allows us to pass back the entire request to the callback
	},
	function(req, username, password, done) {
		findOrCreateUser = function(){
			// find a user in Mongo with provided username
			User.findOne({ 'email' :  username })
			.then((user)=>{
				// If already exists
				if (user) {
					console.log('User already exists with email: '+username);
					return done(null, false, 'That Email Already Exists');
				} else {
					// Hash the password
					const hash = createHash(password);
					// If there is no user with that email
					// create the user
					let newUser = new User({
						email: username,
						password: hash,
					});
					// save the user
					newUser.save()
					.then((user)=> {
						console.log('User Registration succesful');
						return done(null, newUser);
					})
					.catch((err)=>{
						if (err){
							console.log('Error in Saving user: '+err);
							throw err;
						}
					});
				}
			})
			.catch((err)=>{
				console.log('Error in SignUp: '+err);
				return done(err);
			});
		};
		// Delay the execution of findOrCreateUser and execute the method
		// in the next tick of the event loop
		process.nextTick(findOrCreateUser);
	}));
	// Generates hash using bCrypt
	const createHash = function(password){
		return bCrypt.hashSync(password, bCrypt.genSaltSync(10), null);
	}
}
The above code first checks for any issues such as searching our database for any existing email address matches to ensure the user email is unique. It then encrypts the user password using bcrypt, stores it to our database on the save function, and returns our new user to our prior created init.js for use in our session.
Next we create a file called login.js and add the following:
const LocalStrategy   = require('passport-local').Strategy;
const User = require('../models/user');
const bCrypt = require('bcrypt-nodejs');

module.exports = function(passport){
	passport.use('login', new LocalStrategy({
		usernameField: 'email',
		passReqToCallback : true
	},
	function(req, username, password, done) {
		username = username.toLowerCase(); // clear caps
		User.findOne({email: username})
		.catch((err) => {
			return done(err);
		})
		.then ((user) => {
			if(!user) {
				console.log('User Not Found with username '+username);
				return done(null, false, 'Invalid Username');
			}
			// User exists but no password, log the error
			if (user && !user.password){
				console.log('No Password');
				return done(null, false, 'No Password'); // redirect back to login page
			}
			// User exists but wrong password, log the error
			if (!isValidPassword(user, password)){
				console.log('Invalid Password');
				return done(null, false, 'Invalid Password'); // redirect back to login page
			}
			if(isValidPassword(user, password)){
                return done(null, user);
			}
		})
	}));
	const isValidPassword = function(user, password){
		return bCrypt.compareSync(password, user.password);
	}
}
The above file handles our server logins. When a user logs in, this code validates the email and password by checking that it matches in our database. If all matches up with no errors, it will return our user for session use in our prior created init.js file.
Setting Up Our Database User Model
Next we will setup our database model. Since we are creating an authentication app, we will need a place to store our user data, such as email addresses and passwords. That's where our MongoDB comes in. In order to do this, we'll need to create a data model, outlining what data we will store for each user.
First, we will create a models folder in our server directory, to hold the data models. If using the terminal, do this by running the following from within our server directory, or use your preferred code editor:
mkdir modelsCreate a new file called user.js and add the following:
const mongoose = require('mongoose');

function toLower (v) {
	if(v){
		return v.toLowerCase();
	}
}

const Users = new mongoose.Schema({
	email: { type: String, set: toLower },
	password: String,
});

module.exports = mongoose.model('User', Users);
A brief explanation of the above: First we require the mongoose module, which is a middleware that connects our app data with our database. The toLower function is used to rewrite all email addresses to lowercase. This is done as a best practice to ensure all email addresses are formatted the same and we don't accidentally add 2 of the same email addresses because one is capitalized and hence not recognized as different from it's lowercase counterpart. Finally, we define the data we are collecting in our mongoose.Schema. In our case, we are storing just the user email address, and password.
Building Our Server
Next we setup our server, which runs on Node and Express. Together, these code modules handle all actions performed by our user on the server side. These include actions such as listening for user signups, logins, or logouts.
Let's open the server.js file. I am modifying the file from our last tutorial as follows:
const express = require('express')
const mongoose = require('mongoose');
const bodyParser = require('body-parser');
const session  = require('express-session'); // Authentication is stored in sessions, so we'll use express-session
const MongoStore = require('connect-mongo');  // Used to connect our session data to our MongoDB
const passport = require('passport'); // Passport is used for authentication

const app = express()
const port = 3000
require('dotenv').config();

// Connect to our MONGOOSE DB
const connectString = process.env.MONGODB;
mongoose.connect(connectString, { useNewUrlParser: true }).then(
  () => {
    console.log ('Succeeded connected to database');
   },
  err => {
    console.log ('ERROR connecting to database: ' + err);
   }
);

// Initialize Passport
const initPassport = require('./passport/init');
initPassport(passport);
// Create the Session
app.use(session({
	secret: process.env.SESSION_SK,
	resave: true,
	saveUninitialized: false,
	cookie: {
    	httpOnly: false,
		sameSite: true,
		maxAge: 10* 4 * 60 * 60 * 1000,
	},
	store: MongoStore.create({
		mongoUrl: connectString,
		ttl: 10*4 * 60 * 60, // logout after 1hr
	})
}));
app.use(passport.initialize()); // initialize passport login sessions
app.use(passport.session()); // for persistent login sessions


app.use(bodyParser.json());
app.use(bodyParser.urlencoded({ extended: false }));

app.post('/api/login', (req, res, next) => {
	// general flow, 1) calls passport/login, 2) this function, 3) serializes in passport/init 4) deserializes in passport/init
	passport.authenticate('login', function(err, user, info) {
		if (err) {
			console.log('err');
			return res.sendStatus(400);
		}
		if (!user) {
			console.log('no user');
			return res.sendStatus(400);
		}
		req.logIn(user, function(err) {
			if (err) { return next(err); } else {
				console.log(req.session)
				// return
				return res.sendStatus(200);
			}
		});
	})(req, res, next);
});

/*** POST SIGNUP A USER ***/
app.post('/api/signup', (req, res, next) => {
	passport.authenticate('signup', registerUser)(req, res, next);
	function registerUser(err, user, info) {
		if (err) { console.log(err); return res.send(err) }
		if (!user) {
			return res.status(400).json(info);
		}
		if (user){
			req.logIn(user, function(err) {
				if (err) { return next(err); }
				// return
				return res.sendStatus(200);
			});
		}
	}
});

/*** LOGOUT A USER ***/
app.post('/api/logout', (req, res, next) => {
	res.clearCookie('connect.sid');
	req.logout(function(err) {
		console.log('logged out');
		console.log(err)
		req.session.destroy(function (err) {
			res.send();
		});
	});
});

app.listen(port, () => {
  console.log(`Example app listening on port ${port}`)
})
Let's take a closer look at what was changed. We are requiring 3 new npm modules: express-session, connect-mongo, and passport.
const session  = require('express-session'); // Authentication is stored in sessions, so we'll use express-session
const MongoStore = require('connect-mongo');  // Used to connect our session data to our MongoDB
const passport = require('passport'); // Passport is used for authentication
express-session and connect-mongo are both used to connect our login sessions to our Mongo database. These allow us to store a user login session on our database after the user has logged in. Our server script can then connect and check our database if a user is logged in.
We then initialize passport initPassport and start a session.
// Initialize Passport
const initPassport = require('./passport/init');
initPassport(passport);
// Create the Session
app.use(session({
	secret: process.env.SESSION_SK,
	resave: true,
	saveUninitialized: false,
	cookie: {
 		httpOnly: false,
		sameSite: true,
		maxAge: 10 * 4 * 60 * 60 * 1000,
	},
	store: MongoStore.create({
		mongoUrl: connectString,
		ttl: 10 *4 * 60 * 60,
	})
}));
app.use(passport.initialize()); // initialize passport login sessions
app.use(passport.session()); // for persistent login sessions
The above adds our passport init.js, signup.js, and login.js files for use. The session then creates a connection between our server and database to handle the login session. The session will be stored as a cookie on our server, and contain needed login information such as a unique identifier for the session, and when the session should expire for server and database ( maxAge & ttl).
The last part we added are the API routes:
app.post('/api/login', (req, res, next) => {
	passport.authenticate('login', function(err, user, info) {
		if (err) {
			console.log('err');
			return res.sendStatus(400);
		}
		if (!user) {
			console.log('no user');
			return res.sendStatus(400);
		}
		req.logIn(user, function(err) {
			if (err) { return next(err); } else {
				console.log(req.session)
				// return
				return res.sendStatus(200);
			}
		});
	})(req, res, next);
});

/*** POST SIGNUP A USER ***/
app.post('/api/signup', (req, res, next) => {
	passport.authenticate('signup', registerUser)(req, res, next);
	function registerUser(err, user, info) {
		if (err) { console.log(err); return res.send(err) }
		if (!user) {
			return res.status(400).json(info);
		}
		if (user){
			req.logIn(user, function(err) {
				if (err) { return next(err); }
				// return
				return res.sendStatus(200);
			});
		}
	}
});

/*** LOGOUT A USER ***/
app.post('/api/logout', (req, res, next) => {
	res.clearCookie('connect.sid');
	req.logout(function(err) {
		console.log('logged out');
		console.log(err)
		req.session.destroy(function (err) {
			res.send();
		});
	});
});
The above routes handle the client post actions when the user signs up, logs in, or logs out. They utilize the passport scripts we created and sends authentication data back to the client.
Since, we've added new npm modules, we'll need to install them. From our terminal within the server directory, install them by running the following:
npm install express-session connect-mongo passport passport-local bcrypt-nodejsWe also need to create a session key in our .env file. This can be any secret text that you like, and adds a security layer when sending data between our server and our mongo database. In the example below, I am adding this under our MONGODB key created in our last tutorial.
MONGODB=mongodb+srv://<username>:<password>@cluster0.ltkorue.mongodb.net/?retryWrites=true&w=majority
SESSION_SK = mysecretkey
Building Our Client
Now we build our front end framework using VueJs. The frontend framework defines everything on our user's browser, including how the app looks via HTML & CSS. It also handles our client side actions, for example when the user clicks "Login," the client side will post this action to our server.
Now, we'll be working from our client directory. First, we'll be using the vue3-cookies module to get our authentication cookie on the client. Let's install this now. From our client directory, run the following:
npm install vue3-cookies --saveNext, open the App.vue file and rewrite the entire file as follows:
<template>
<div>
<main class="main">
<form v-if="!authenticated">
<input
type="text"
placeholder="Email Address"
v-model="email"
/>
<input
type="password"
placeholder="Password"
v-model="password"
/>
<input type="submit" value="Sign Up" @click.prevent="onSignup"/>
<input type="submit" value="Login" @click.prevent="onLogin" />
</form>
<form @submit.prevent="onLogout" v-if="authenticated">
<h1>You're Logged In!</h1>
<br>
<input type="submit" value="Logout" />
</form>
</main>
</div>
</template>
<script lang="ts">
import { defineComponent, onMounted, ref } from 'vue'
import axios from 'axios'
import { useCookies } from "vue3-cookies";
axios.defaults.withCredentials = true
export default defineComponent({
setup() {
const { cookies } = useCookies() as any
return { cookies }
},
data() {
return {
email: "" as string,
password: "" as string,
result: "" as string,
authenticated: false as boolean,
}
},
computed: {
checkCookie() {
if (this.cookies.get('connect.sid')) {
return true
} else {
return false
}
},
},
methods: {
onSignup() {
try {
axios
.post("/api/signup", {
email: this.email,
password: this.password,
})
.then((response) => {
this.authenticated = true
}, (error) => {
throw error || new Error(`Request failed`);
})
} catch(error:any) {
}
},
onLogin() {
try {
axios
.post("/api/login", {
email: this.email,
password: this.password,
})
.then((response) => {
this.authenticated = true
}, (error) => {
throw error || new Error(`Request failed`);
})
} catch(error:any) {
// Consider implementing your own error handling logic here
alert(error.message);
}
},
onLogout() {
try {
axios
.post("/api/logout")
.then((response) => {
this.authenticated = false
}, (error) => {
throw error || new Error(`Request failed`);
})
} catch(error:any) {
// Consider implementing your own error handling logic here
console.error(error);
alert(error.message);
}
},
},
mounted(){
this.authenticated = this.checkCookie
}
});
</script>
<style>
@font-face {
font-family: "ColfaxAI";
src: url(https://cdn.openai.com/API/fonts/ColfaxAIRegular.woff2)
format("woff2"),
url(https://cdn.openai.com/API/fonts/ColfaxAIRegular.woff) format("woff");
font-weight: normal;
font-style: normal;
}
@font-face {
font-family: "ColfaxAI";
src: url(https://cdn.openai.com/API/fonts/ColfaxAIBold.woff2) format("woff2"),
url(https://cdn.openai.com/API/fonts/ColfaxAIBold.woff) format("woff");
font-weight: bold;
font-style: normal;
}
.main,
.main input {
font-size: 16px;
line-height: 24px;
color: #353740;
font-family: "ColfaxAI", Helvetica, sans-serif;
}
.main {
display: flex;
flex-direction: column;
align-items: center;
padding-top: 60px;
}
.main .icon {
width: 34px;
}
.main h3 {
font-size: 32px;
line-height: 40px;
font-weight: bold;
color: #202123;
margin: 16px 0 40px;
}
.main form {
display: flex;
flex-direction: column;
width: 320px;
}
.main input {
padding: 12px 16px;
border: 1px solid #10a37f;
border-radius: 4px;
margin-bottom: 24px;
outline-color: #10a37f;
}
.main ::placeholder {
color: #8e8ea0;
opacity: 1;
}
.main input[type="submit"] {
padding: 12px 0;
color: #fff;
background-color: #10a37f;
border: none;
border-radius: 4px;
text-align: center;
cursor: pointer;
}
.main .result {
font-weight: bold;
margin-top: 40px;
}
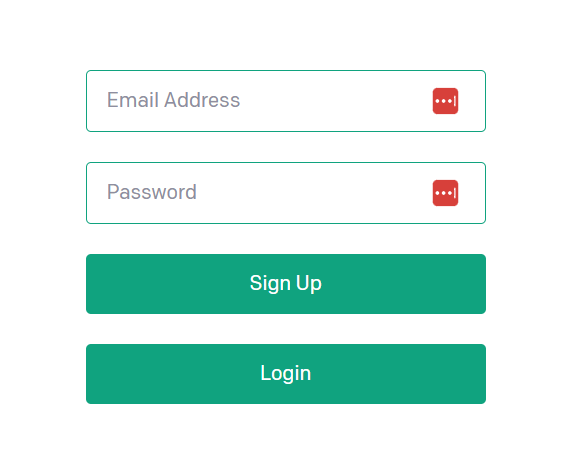
</style>Let's explain the above. The first major change is our login form:
<form v-if="!authenticated">
<input
type="text"
placeholder="Email Address"
v-model="email"
/>
<input
type="password"
placeholder="Password"
v-model="password"
/>
<input type="submit" value="Sign Up" @click.prevent="onSignup"/>
<input type="submit" value="Login" @click.prevent="onLogin" />
</form>
<form @submit.prevent="onLogout" v-if="authenticated">
<h1>You're Logged In!</h1>
<br>
<input type="submit" value="Logout" />
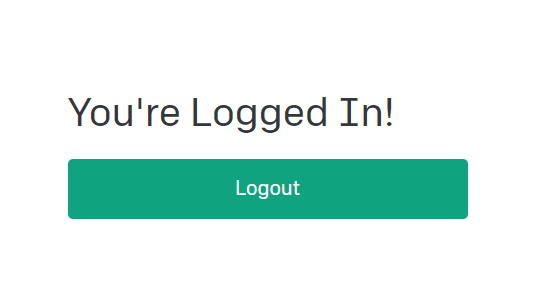
</form>We've added an HTML form that takes both the email and password inputs. We've also added a signup and login button. Below that is another form intended for logged in users, with only one button to log out. Both forms use the v-if functionality provided by VueJs to check against an authenticated variable. If the user is not authenticated, it shows the first login/signup form, and if the user is authenticated, it shows the second logout form.
Implementing Vue3 Cookies
The next major highlight is the use of vue3-cookies:
import { useCookies } from "vue3-cookies";

axios.defaults.withCredentials = true
export default defineComponent({
    setup() {
        const { cookies } = useCookies() as any
        return { cookies }
    },
Per the vue3-cookies documentation, we are importing this module and making it available to our app during setup(). When a user logs in, our server sends a cookie to the client. It's important for our client to search for this cookie, especially on hard reloads, to see if we've already logged in. Hence, later in this file we add a computed property to check for authentication by cookie:
computed: {
    checkCookie() {
        if (this.cookies.get('connect.sid')) {
            return true
        } else {
            return false
        }
    },
},
We utilize this function whenever our app mounts, which is added later in our script as follows:
mounted(){
    this.authenticated = this.checkCookie
}
The above check happens whenever the app mount, such as during a hard reload. Hard reload will clear most of our app data but does not clear cookies, hence we can check for authentication if our cookie is still present.
Adding Our Client Data
Next, we define the variables that our client will use. In our case: email, password, and authenticated. We can see these variables sprinkled into our app's HTML forms that we wrote earlier.
data() {
    return {
        email: "" as string,
        password: "" as string,
        authenticated: false as boolean,
    }
},
Handling User Actions
Finally, we add the javascript functions on the client for handling user signups, logins, and logouts. You can also find these functions defined on our HTML form buttons that we wrote earlier. These functions post the necessary user data to our server routes.
methods: {
    onSignup() {
        try {
        axios
        .post("/api/signup", {
            email: this.email,
            password: this.password,
        })
        .then((response) => {
            this.authenticated = true
        }, (error) => {
            throw error || new Error(`Request failed`);
        })
        } catch(error:any) {
        }
    },
    onLogin() {
        try {
        axios
        .post("/api/login", {
            email: this.email,
            password: this.password,
        })
        .then((response) => {
            this.authenticated = true
        }, (error) => {
            throw error || new Error(`Request failed`);
        })
        } catch(error:any) {
            // Consider implementing your own error handling logic here
            alert(error.message);
        }
    },
    onLogout() {
        try {
            axios
            .post("/api/logout")
            .then((response) => {
                this.authenticated = false
            }, (error) => {
                throw error || new Error(`Request failed`);
            })
        } catch(error:any) {
            // Consider implementing your own error handling logic here
            console.error(error);
            alert(error.message);
        }
    },
},
With that, your authentication app is ready to go!
Let's restart our client and server scripts that we ran earlier (press ctrl c to stop any existing scripts).
From the client directory, run:
npm run devFrom the server directory, run:
node server.jsAnd, we should then see our app in action: