Git is an essential tool for developers that you'll want to become proficient with. It tracks and manages just about everything you code, making it really easy to review the history of your app, and to collaborate with team mates. GitHub is also very important, as it pretty much is your resume for employment, so as you move forward, you'll want to build on this to showcase your coding skills.
Prerequisites
- You're able to work with the command line. Check out Part1 to get some basic knowledge.
- You'll need some basic knowledge of html. Try freeCodeCamp or Udemy to learn more.
Git'ting Started ?
Open up your terminal and let's install git!
For Mac:
You can install git using brew by entering:
$ brew install gitFor Linux or Ubuntu
You can install git using apt by entering:
$ sudo apt install git-allLet's Use Git To Make A Webpage
From your desktop, create a new directory, and move into your new folder:
mkdir webpage
cd webpage
Next we'll initiate this new folder as a git repository by entering:
git initCongrats! Now you have your first app repository. Now let's create your first webpage using nano:
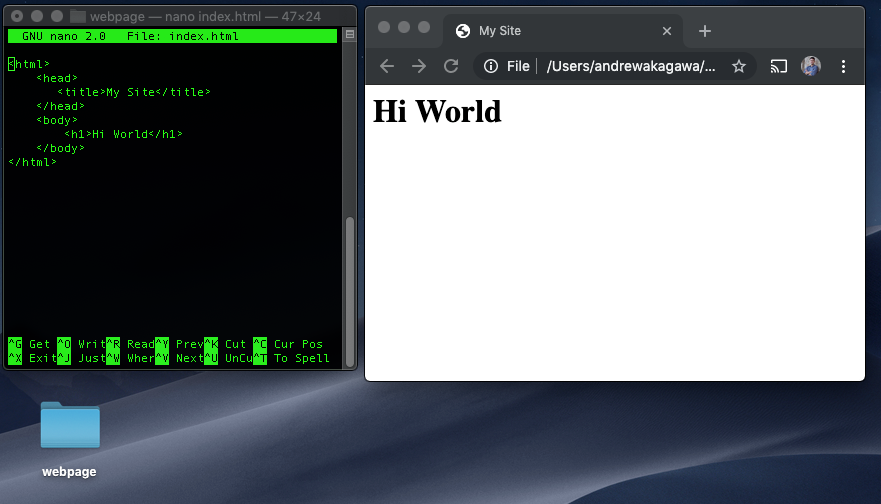
nano index.htmlBy the way, index.html is the default page that a server looks for on a directory, and is generally the name of your homepage for websites.
We will make a super basic website by entering the following:
<html>
    <head>
       <title>My Site</title>
    </head>
    <body>
        <h1>Hi World</h1>
    </body>
</html>
The above is a simple html file, with the standard head and body components. The head is for metadata, such as a title that can be shown in tabs or for search results. The body is where all the visuals on your page go. In our case we added the headline "Hi World."
Now save your work by pressing cntr o .
You should be able to see your new webpage file from the "webpage" directory on your computer. Congrats, you have your first webpage! Go ahead and open it.
Once you're done admiring your work, press cntr x to exit out of nano.
Committing To Git
Git is a version control system that will save snapshots of your app as you go. These are called commits. To start your first commit type the following to gather all your changes:
git add --allNow you're ready to commit your changes. Each commit should have a descriptive message for what has changed (or in our case, what is created):
git commit -m "Created the index.html file"The above command commits the change. Your message goes in quotations after the -m. Now you've created a snapshot in time for your app, as it is now, should you ever need to go back.
Git'ting Started With GitHub! ?
GitHub is not git, and is instead a 'hub' for your git... If that makes sense.
One of the best ways to store your code is not on your computer, and instead on a remote server. That is exactly what GitHub does, while also making everything look really nice, and providing various features to collaborate with other developers. It can also host static websites for you, for free!
Head on over to GitHub to create your account.
Once created, click "Start A Project", and name your repository "website."

GitHub then gives you some nifty terminal instructions. In our case, we have an existing repository, so scroll to the instructions for that section (shown below). Note: In the image below, your git url will be different than mine, so be sure to copy from GitHub.
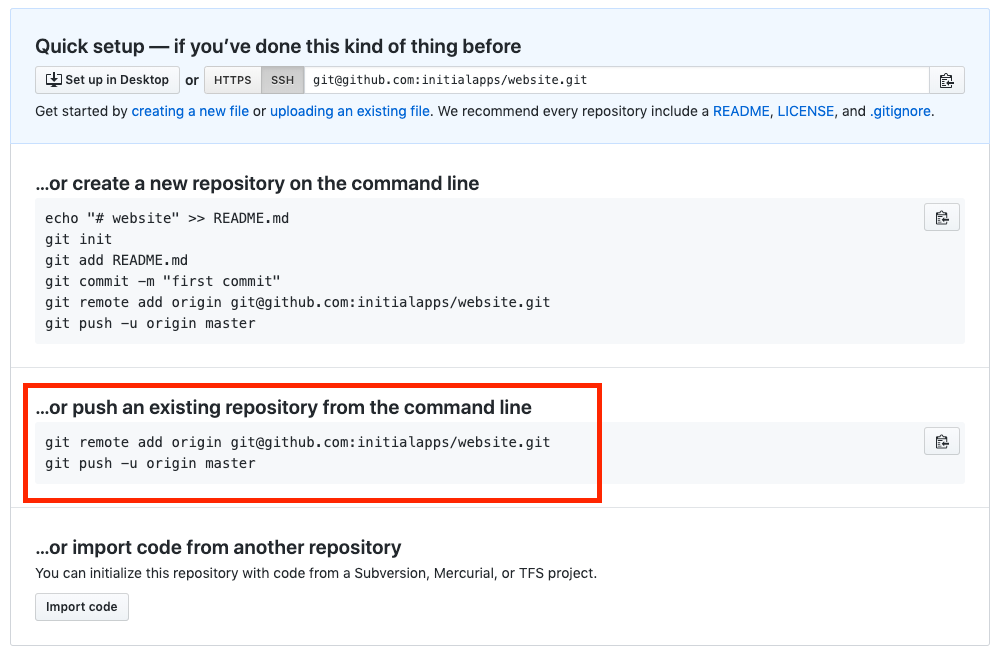
The above commands first adds your GitHub account to your local folder, and next copies (or pushes) your code to the GitHub server. From your website directory, type your GitHub commands into your terminal.
You may be asked to log in with your GitHub username and password. Note: For security purposes, your password will not show when you type it, so just type away and hit enter when done.
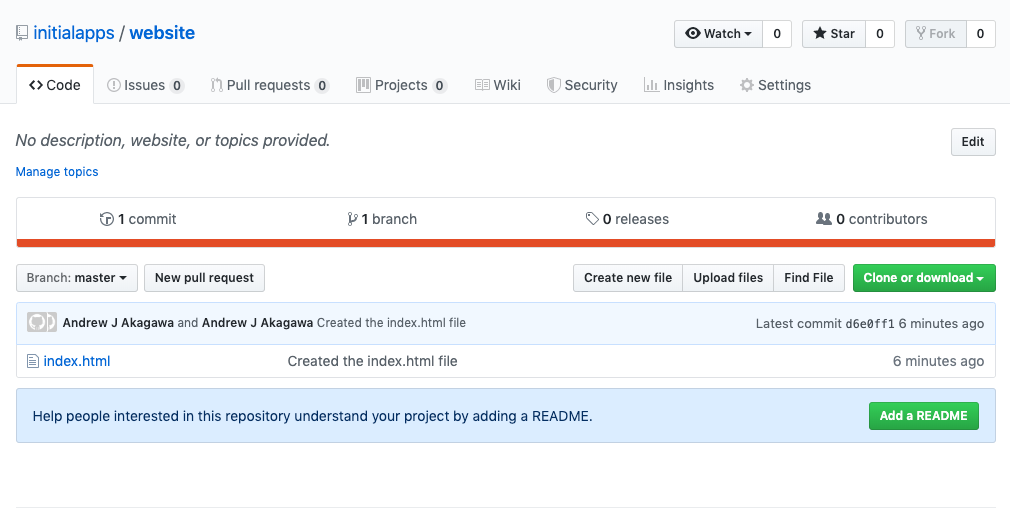
Now that you've pushed, you should be able to refresh your GitHub account, and find your code there:
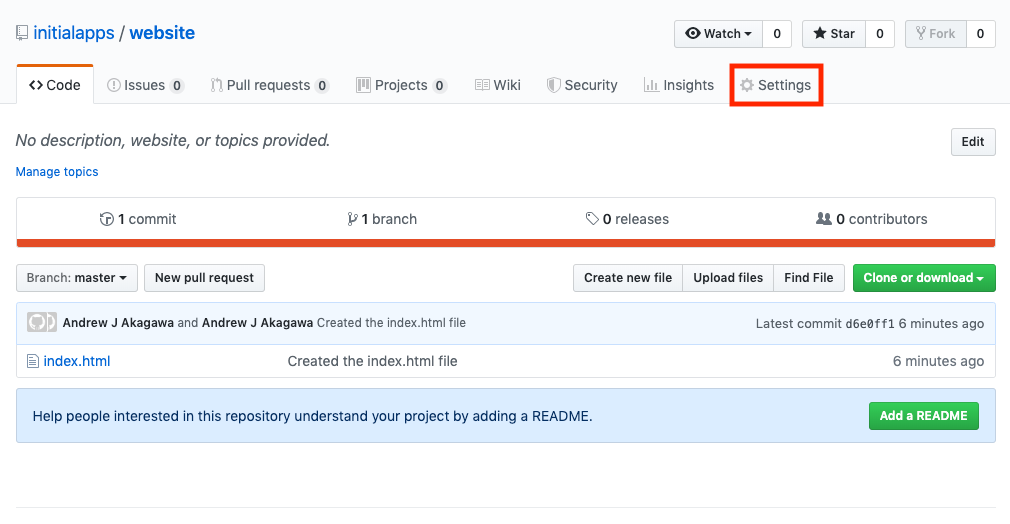
You can also see your webpage hosted and can even route this to your own personal domain. Follow these steps to find your hosted domain:
Go to settings:
Next select scroll to GitHub Pages and select master branch
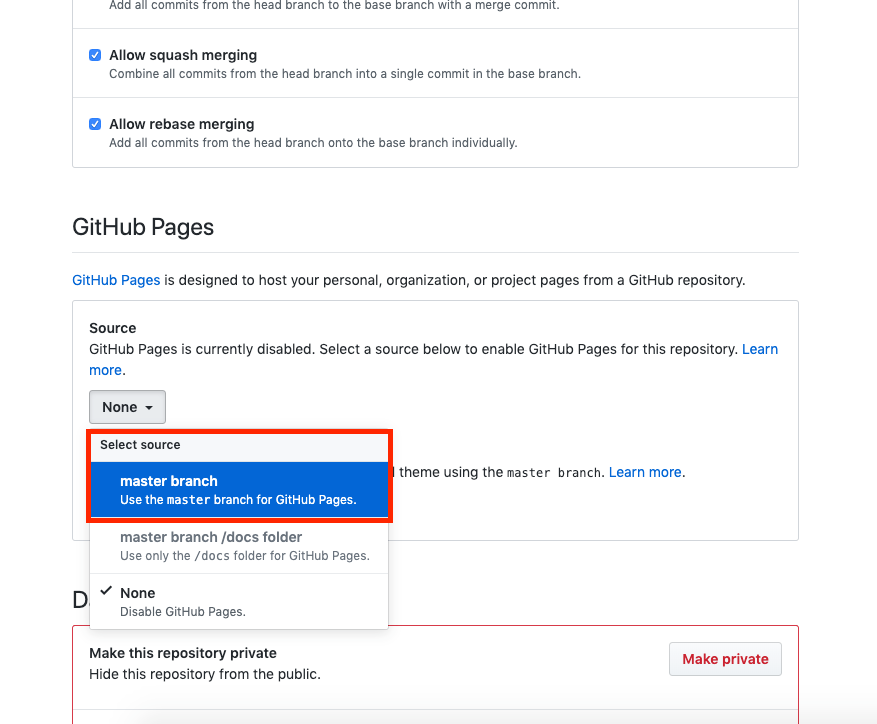
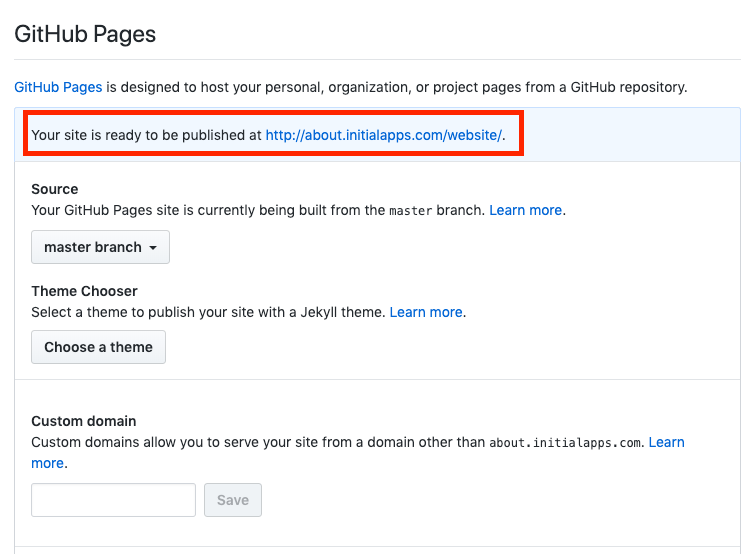
Scroll again to GitHub Pages to find your url
This may take a few browser refreshes to load, but after a few minutes, you should have a hosted site.
Making Updates
Finally, let's explore making a change to your app. Open your index file with nano:
nano index.htmlNow let's change our message from "Hi World" to "Hi Universe"!
<html>
    <head>
       <title>My Site</title>
    </head>
    <body>
        <h1>Hi Universe</h1>
    </body>
</html>
Save and exit nano by entering cntl o and cntl x.
Now commit and push to the server:
git add --all
git commit -m "deciding to say hello to the universe"
git push origin master
Note: You will use the above three commands quite often as a developer.
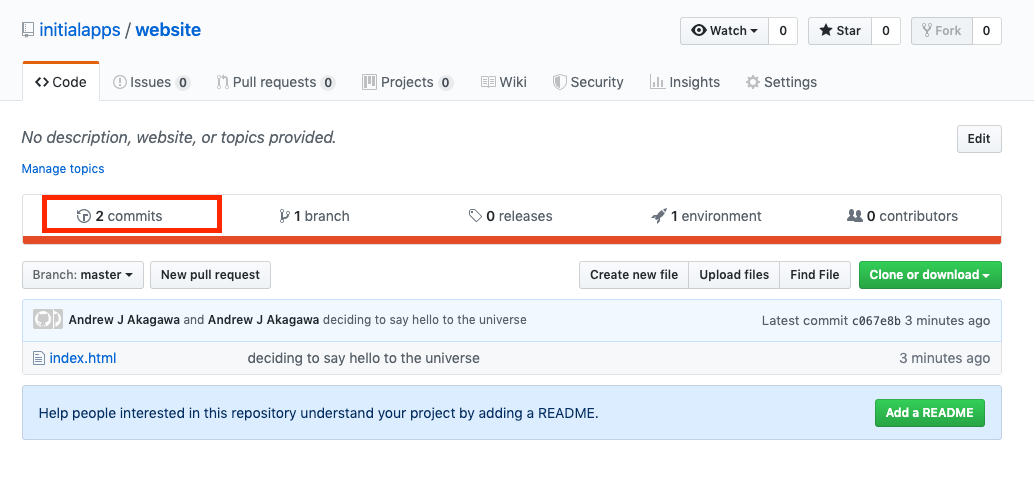
Finally, mosey on back to GitHub to see your changes. You can now view your app's history by clicking the commits:
Building Your GitHub Portfolio
One other important aspect of GitHub is that it's basically become your resume. If your goal is to get employed, at some point you'll want to learn how to make your account look nice. However, no worries for now as you're just starting out. Like all great things, coding takes time and patients.
Hooray, now you know the basics of git!
Next, we'll explore hacking your browser console. ?
